Introduction to Janars
Janars is an online platform for building interactions between people and groups. Each organization can have their own tenant site. For instance for this demonstration we have created a site called messerhr.janars.com. This is in fact linked to our development site.
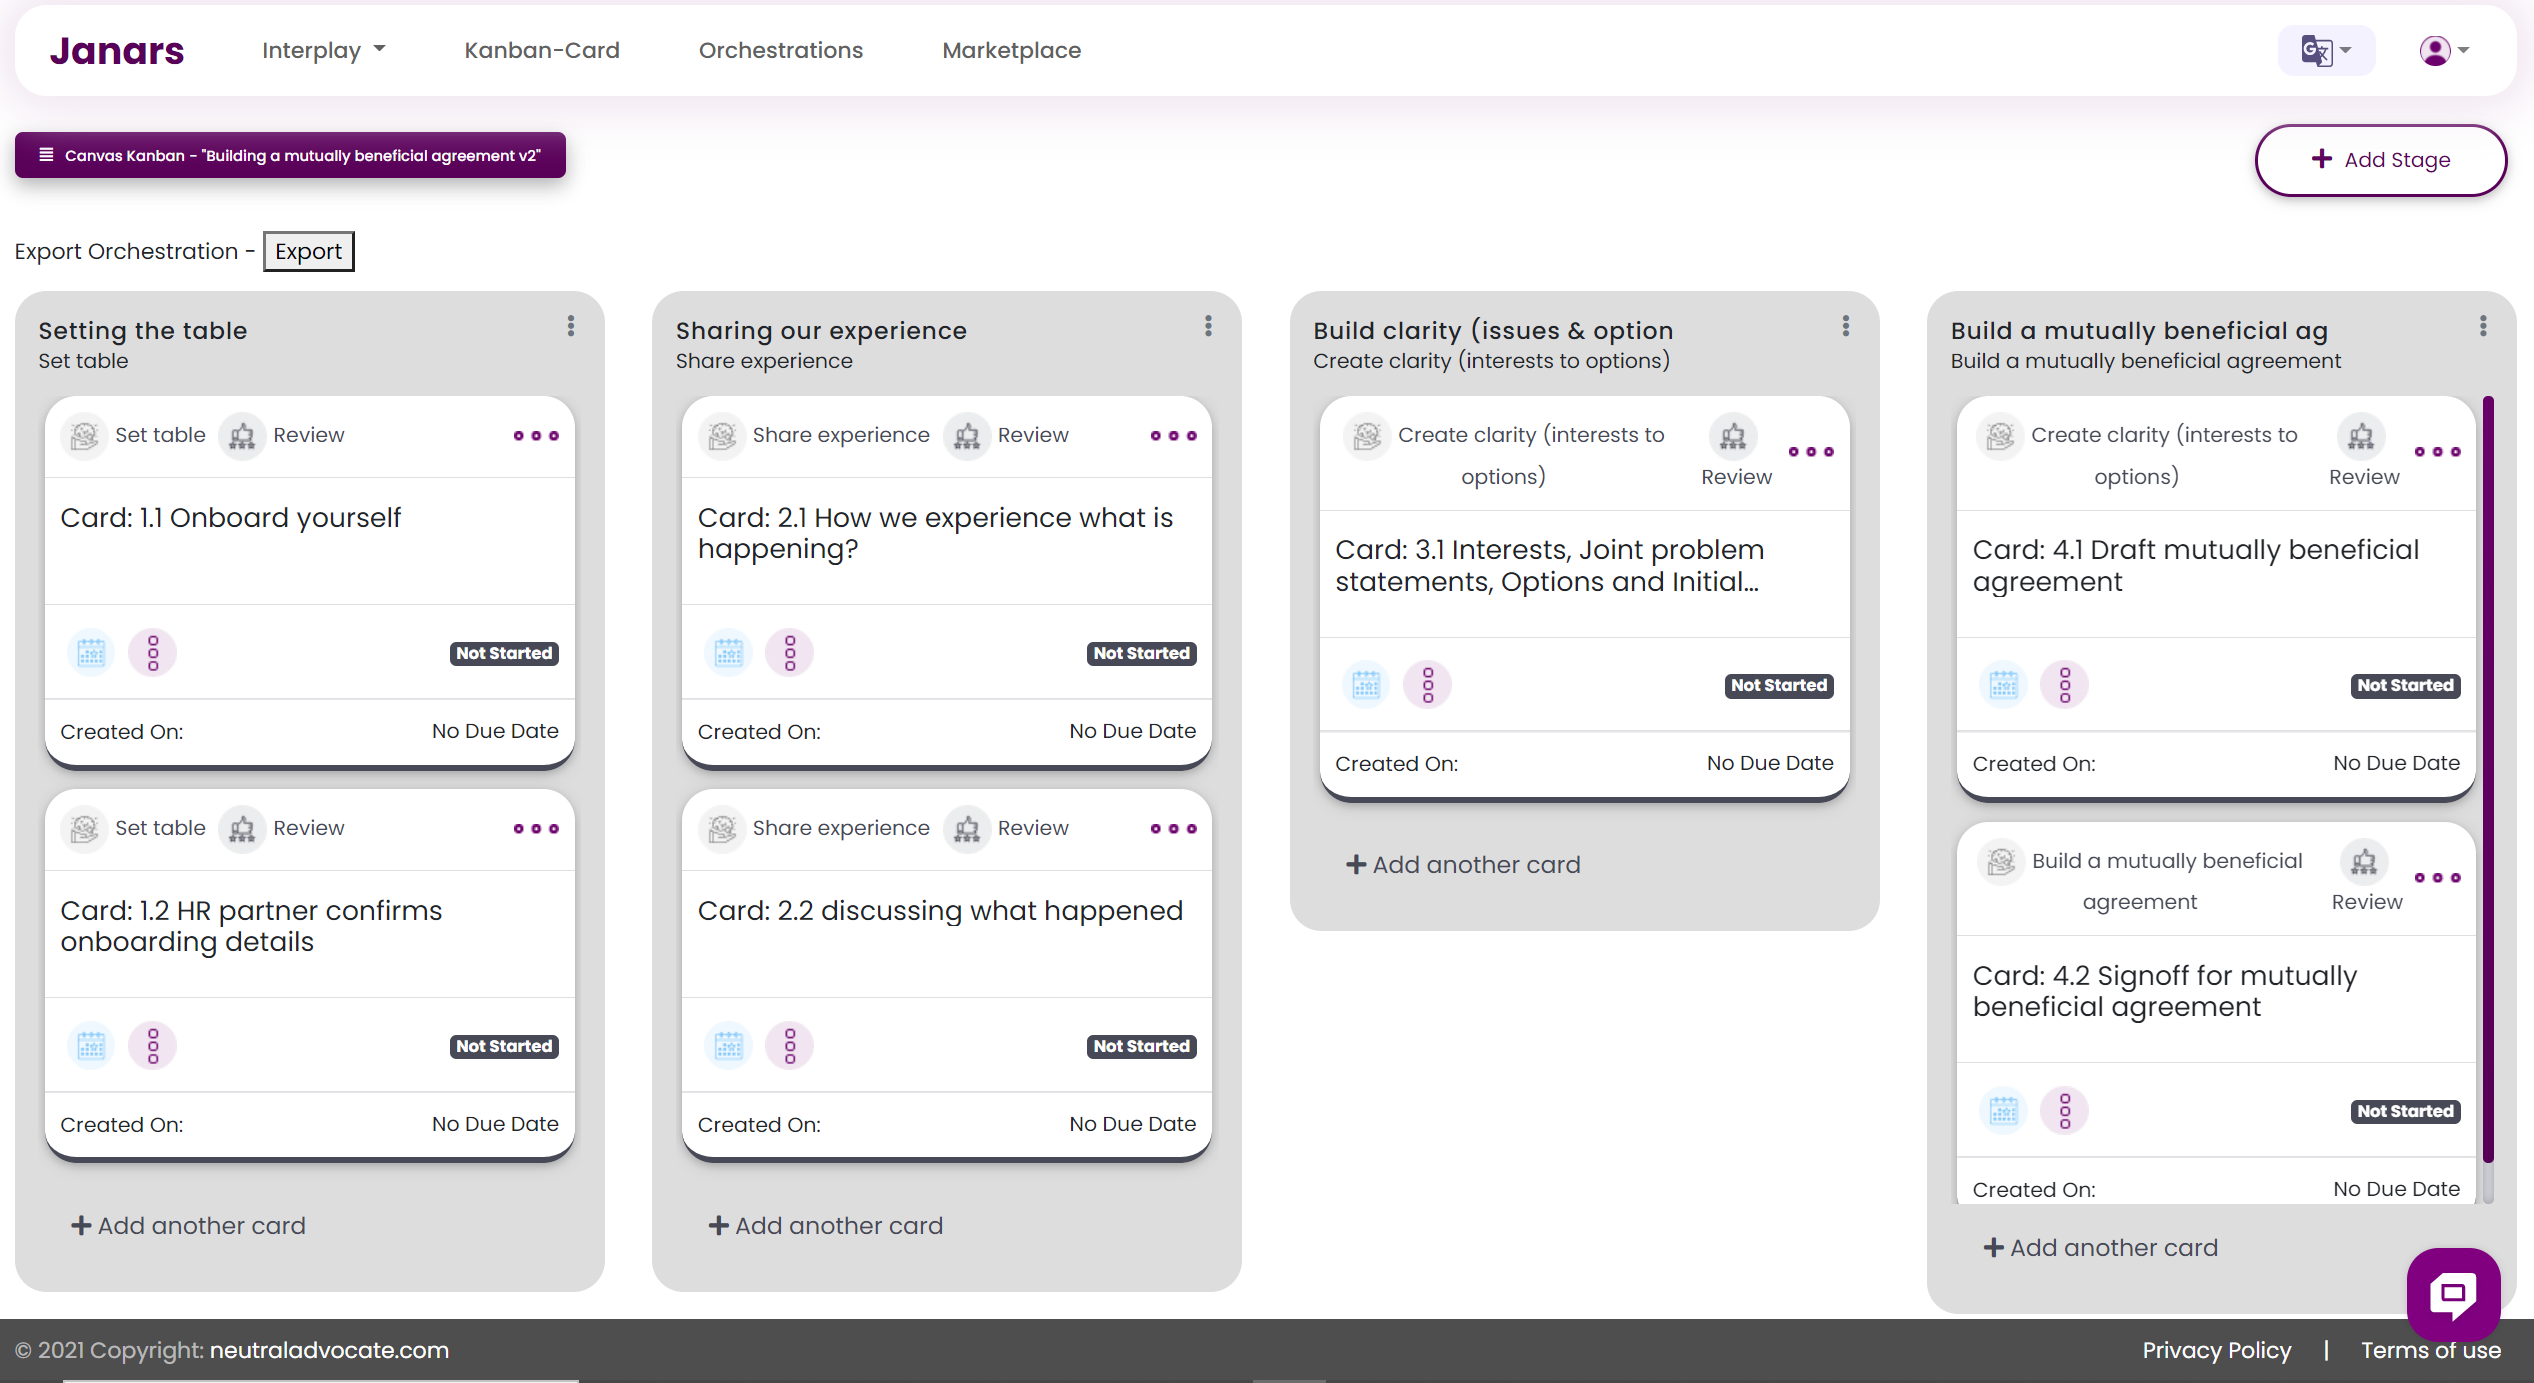
The interplay - On this site we have created a flow for HR hosts/facilitators to work with participants to resolve a situation through a mutually beneficial agreement. We have configured it in 4 stages:
- Onboarding participants
- Sharing our experience of what happened, and the problem being faced together.
- Building clarity in terms of understanding core interests, developing options and shortlisting solutions.
- Building an agreement.
What creates the value: In addition to the HR facilitator’s support for the process, the business value for such a service is expected to come from
- encouraging participants to take responsibility for solving these situations;
- helping them prep independently;
- by asking them to reflect on key questions as part of this prep process; and
- by providing a structured resolution process which they are actively involved in.
The business value targeted (needs validation):
- It will offer an easier alternative to the formal grievance process and will serve to reduce the number of formal grievances raised
- Better outcomes achieved as participants have more involvement in solution creation and take more responsibility for the outcome.
- Shorter process and better outcomes reduces impact on staff as they take less time to resolve and it has less emotional toll for participants long term.
- Saving HR partner time in the facilitation process:
- Less time on-boarding and gathering data as participants answer questions in Janars
- Faster process to reach settlement (may take initially more time. Yet the expected ability to reach a more satisfactory resolution faster reduces the back and forth later on in the agreement process).
The interplay: Building a mutually beneficial agreement v2
Instructions for Facilitator for the initial onboarding process
Concept for the demonstration:
In the current design, the first 3 steps (cards) are largely participants providing input. The next two cards are largely dialogue and writing together. Last two are negotiating an agreement and signing it off.
As explained in the instructions in Janars, there are many different ways you can onboard participants. This is one path:
The initial steps are:
- Facilitator sign-in & setup interplay
- Sign onto the URL with user name and password details provided in the email (we have allocated a username, email and password)
- Click on Interplay Setup - Enter in name of interplay and goal. Please pick a situation that you and the participants can easily relate to and play these roles for.
- Connect with the participants and ask them to go to URL provided in the email and sign in with emails, user names and passwords provided in the email. You should see the interplay that you have created.
- Setup the team with the participants and yourself. This is part of the “Setup Interplay” wizard. Set yourself up as a facilitator.
- Participants - complete the next two steps triggered by an email (or a call) before joining a meeting with the facilitator:
- Complete onboarding process (card 1.1) and raise any questions to facilitator.
- Then they will answer questions about “what happened” (card 2.1)
- When both parties are done 2.1, they can review both answers in 2.2 until the meeting to discuss 2.2 and the following steps is called.
Relevant instructional videos for facilitators
Instructions for Participants for the initial onboarding process:
The steps for the participants are:
- Connect to URL and sign on with user details
- Complete the onboarding process (card 1.1) and then once they have completed raise questions to facilitator or Janars via the chat widget).
- Wait to receive a card with questions about “what happened” (card 2.1)
- When both parties are done card 2.1, then review both answers in 2.2. The facilitator will organize to meet to discuss 2.2 and the next steps that take us to exploring options and building an agreement.
Relevant instructional videos for Participants
Instructions for Facilitator and Participants for the meeting:
These instructions are from the Janars tool
Card 2:2: Discussing what happened
Now with the information initially shared, it is really time to talk and dialogue. There are three conversations to have:
- The "what happened" conversation (already written). It is a great opportunity to hear the other participants' perspectives. Aim to listen to understand. Reflect back on what you heard, not to agree on it, but to assure the other participant that they have been heard and understood.
- An analysis of "what happened" - a conversation to understand what are the agenda items that need discussing. What the participant's key positions are? What pulls the participants together and apart? And explore the impact. This will be documented by the lead/facilitator.
- A discussion of what we have in common in terms of shared outcomes and a perspective on what is being faced together.
In all these discussions, reflecting back on what you heard to confirm understanding is a great technique to build rapport and create a positive environment through which solutions can be worked out.
|
Participant role to capture data and facilitator review and facilitation role 2:02 (also shown for the above section) |
data is collected then shared and used in a facilitated conversation 1:57 |
Card 3.1 - Interests, Joint problem statements, Options and Initial solutions
The agenda topics come from the prior card. In this card, the facilitator will support you (a participant) talk together through via a series of events:
- Each agenda topic - working through your positions and underlying interests. These can be documented by yourself, the lead/facilitator, or other participants. This activity will be part of event "Uncover Interests From Positions"
- Explore a wild list of options - now it is time to write down as many options as you can think of. This is often done in two stages: Blind and shared.
- Blind - answers are not shared for an agreed time. This can be extended. A timer can be set.
- Shared - this is when the answers are shared. And everyone can continue to add and refine the answers. Similar ones can be grouped. The group can develop labels and classify them.
This is like brainstorming but we write the answers down. It is called "brainwriting". We ask participants to list all options without hesitation. Even ones they know will never happen as they are 100% in their favor. Creativity often leads to identification of unexpected options. Sometimes a specifically high number of options are asked for. There is value in numbers. The standard rules of brainstorming apply. No judging the value of the idea. Be creative. Go crazy, wild ideas are good.
- Prioritize options by voting on each option in terms of Q1 - priority to discuss first, and Q2 - priority of this option in the agreement. The default setup is 4 votes per question across all the options. After voting, the lead/facilitator will close the event and you can see how you voted through the personal view. Also try the chart view to explore the data visually.
- Develop a shortlist of solutions from the prioritized list of options - this is a discussion. It is possible to copy options or write them out from scratch. This is best done by one participant or facilitator/lead leading the discussion on one item and then switching roles. This is not the final list but should include all the options that all participants want considered as the mutually beneficial agreement is built out.
Each event is set up, started, revised, and closed by the facilitator/lead. When they start it, they will send a sync request to bring your screen in sync with theirs. Also when they change the view within an event and make an update, a refresh icon will flash on your screen (next to the event), and when you click it, you are sync with the facilitator screen.